前言
hexo博客里插入codepen,本质就是在文章.md中插入一段iframe标签代码。
但这样插入会让文章.md的可读性变差,不符合我的审美。
于是按图索骥,捣鼓了hexo-codepen-snippet插件,它能更优雅地将codepen插入文章.md中。
本文记录了插件的开发、使用与上线。
插件开发
基于hexoExtensions中的Tag能力,将iframe标签代码片段抽象成模版,封装成自定义标签。
基本用法,详见文档
1 | // name 自定义标签名,funciton为插件功能回调函数 |
hexo-codepen-snippet插件的核心实现如下,详见源码。
1 | hexo.extend.tag.register('codepen', (args) => { |
这里的config字段分为两类:
- 有默认值:
style、scrolling、frameborder、loading、allowtransparency、allowfullscreen都是iframe标签的属性。 - 无默认值:
src_prefix、slug_hash、default_tab、theme_id共同构成iframe.src的值,在hexo博客使用插件时必传。
config字段值可以参考codepen中Embed的配置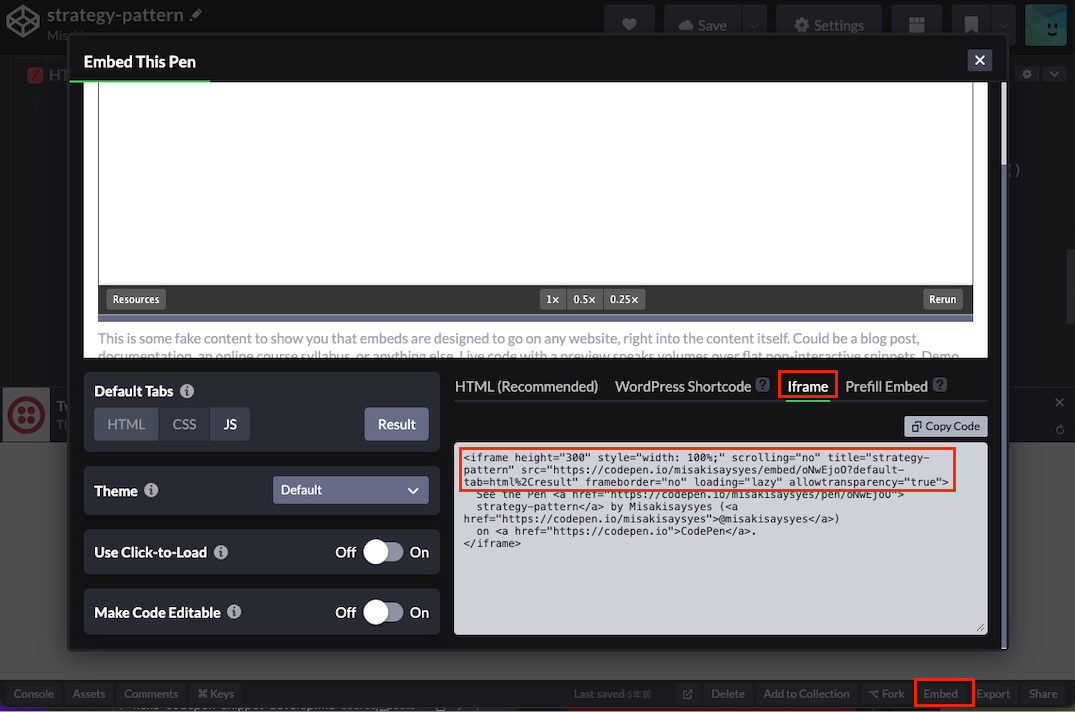
插件使用
首先需要在项目中引入插件脚🦶本,然后做全局配置,之后就可以在文章.md中使用自定义标签了。
脚🦶本引入
方式一
首先博客根目录下(package.json同级目录下)的script目录中引入。
| - MyBolg
    | - package.json
    | - ...
    | - scripts // 自定义插件目录
        | - index.js // 自定义插件脚本
这种方式适用于插件比较简单的情况。
方式二
npm包方式引入,注意:包名必须以hexo-开头。
| - MyBolg
    | - node_modules // npm包目录
        | - hexo-xxx
            | - package.json
            | - index.js // 自定义插件脚本
全局配置
在配置文件中引入codepen插件
| - MyBolg
    | - _config.yml // 配置文件
在_config.yml的codepen插件配置中,可以全局配置无默认值的config字段,如下
1 | # codepen |
标签使用
文章.md中插入标签如下:
1 | {% codepen slug_hash:WNOjqzq %} |
用slug_hash区分不同的codepen
插件上线
插件实现后,需要将包上线,即将代码上传到github仓库,并将包发到npm上。
手动发包的流程为:
[1] 本地修改版本号package.json version (npm version)。
[2] 本地修改CHANGELOG.md (手动)。
[3] 本地commit后打tag (git commit 后 git tag)。
[4] 推送到github仓库 (git push)。
[5] 发布包到npm上 (npm publish)。
略繁琐,这里借助semantic-release和git action,实现自动化发包,简化发包流程。
在自动化发包的流程中,开发者在本地commit并push之后,git action就会根据项目中的流水线配置.github/workflows/main.yml触发semantic-release。
semantic-release会根据commit message的type(feat、fix、etc…)匹配发布对应版本的(major、patch、etc…)npm包,无需开发者介入自动完成手动发包的1~5步。
commit message type详细见:config-conventional
commit message type与npm包版映射关系详见:默认映射
使用semantic-release和git action需要在两处做配置:
- 项目仓库:详见参考,主要涉及
semantic-release设置配置和git action流水线配置 - github:需要在仓库 -> settings -> secrets and variables -> actions中配置
NPM_TOKEN(token获取地址:https://www.npmjs.com/)
附git action资料:github action 阮一峰教程 、github action 官方文档